| N/A | N/A | |||||
| File:Capes of accomplishments (trimmed).gif Cape of accomplishment | ||||||
| N/A | N/A | N/A | N/A | N/A | ||
No edit summary |
No edit summary |
||
| Line 5: | Line 5: | ||
== The Fight == | == The Fight == | ||
Being a fairly straightfoward fight, it's a good boss to farm to get a lucky drop from and some easy PKP. Simply '''ALWAYS''' pray range or you will take 80+ damage from his triple range attack. The only damage you should be taking is from his melee attacks that do minimal damage in comparison. You can flick soulsplit on if you'd like more efficient kills. As always bring a familiar to speed up kills. | Being a fairly straightfoward fight, it's a good boss to farm to get a lucky drop from and some easy PKP. Simply '''ALWAYS''' pray range or you will take 80+ damage from his triple range attack. The only damage you should be taking is from his melee attacks that do minimal damage in comparison. You can flick soulsplit on if you'd like more efficient kills. As always bring a familiar to speed up kills. | ||
<tabber> | <tabber> | ||
Melee Method= | Melee Method= | ||
{| class="wikitable sticky-header" style=text-align:center; | {| class="wikitable sticky-header" style=text-align:center; | ||
! <center>Slot</center> !! colspan="5"|<center>Item (most effective → least effective) </center> | ! <center>Slot</center> !! colspan="5"|<center>Item (most effective → least effective) </center> | ||
|- | |- | ||
|[[File:Head slot.png|center]] | |[[File:Head slot.png|center]] || [[File:Neitiznot faceguard.png]] Neitiznot faceguard || [[File:Torva full helm.png]] Torva full helm || [[File:Slayer helmet (i).png]] Slayer helm (i)<sup>2</sup> || [[File:Serpentine helm.png]] Serpentine helm or [[File:Helm of neitiznot.png]] Helm of Neitiznot | ||
|- | |- | ||
|[[File:Neck slot.png|center]] || [[File:Amulet of torture.png]] Amulet of torture || [[File:Amulet of fury.png]] Amulet of fury || [[File:Amulet of glory.png]] Amulet of glory || {{NA}} || {{NA}} | |[[File:Neck slot.png|center]] || [[File:Amulet of torture.png]] Amulet of torture || [[File:Amulet of fury.png]] Amulet of fury || [[File:Amulet of glory.png]] Amulet of glory || {{NA}} || {{NA}} | ||
| Line 16: | Line 16: | ||
|[[File:Cape slot.png|center]] || [[File:Completionist cape.png]] (Slaughter/Master) Completionists cape || [[File:Tokhaar-kal.png]] Tokhaar-kal || [[File:Fire cape.png]] Fire cape || [[File:Max cape.png]] Max cape || [[File:Capes of accomplishments (trimmed).gif]] Cape of accomplishment | |[[File:Cape slot.png|center]] || [[File:Completionist cape.png]] (Slaughter/Master) Completionists cape || [[File:Tokhaar-kal.png]] Tokhaar-kal || [[File:Fire cape.png]] Fire cape || [[File:Max cape.png]] Max cape || [[File:Capes of accomplishments (trimmed).gif]] Cape of accomplishment | ||
|- | |- | ||
|[[File:Body slot.png|center]] | |[[File:Body slot.png|center]] || [[File:Statius's platebody.png]] Statius's platebody || [[File:Torva platebody.png]] Torva platebody || [[File:Bandos chestplate.png]] Bandos chestplate || [[File:Dharok's platebody.png]] Dharok's platebody (or Barrows platebodies) | ||
|- | |- | ||
|[[File:Legs slot.png|center]] | |[[File:Legs slot.png|center]] || [[File:Statius's platelegs.png]] Statius's platelegs || [[File:Torva platelegs.png]] Torva platelegs || [[File:Bandos tassets.png]] Bandos tassets || [[File:Dharok's platelegs.png]] Dharok's platelegs (or Barrows platelegs) | ||
|- | |- | ||
|[[File:Weapon slot.png|center]] || [[File:Scythe of vitur.png]] Scythe of vitur | |[[File:Weapon slot.png|center]] || [[File:Scythe of vitur.png]] Scythe of vitur || [[File:Ghrazi rapier.png]] Ghrazi rapier || [[File:Chaotic rapier.png]] Chaotic rapier|| [[File:Abyssal whip.png]] Abyssal whip | ||
|- | |- | ||
|[[File:Shield slot.png|center]] || [[File:Avernic defender.png]] Avernic defender ||[[File: Dragon defender.png]] Dragon defender || [[File:Dragonfire shield.png]] Dragonfire shield || [[File:Rune defender.png]] Rune defender || [[File:Crystal shield.png]] Crystal shield | |[[File:Shield slot.png|center]] || [[File:Avernic defender.png]] Avernic defender ||[[File: Dragon defender.png]] Dragon defender || [[File:Dragonfire shield.png]] Dragonfire shield || [[File:Rune defender.png]] Rune defender || [[File:Crystal shield.png]] Crystal shield | ||
Revision as of 16:22, 30 December 2023


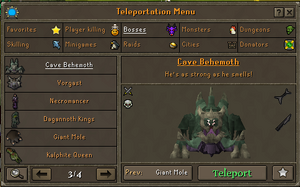
The Cave Behemoth is another deep wilderness boss commonly killed for it's Voidwaker components. It's also a very popular wilderness daily task.
The Fight
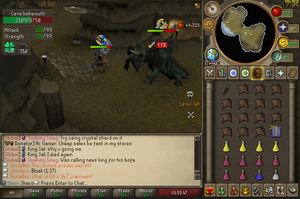
Being a fairly straightfoward fight, it's a good boss to farm to get a lucky drop from and some easy PKP. Simply ALWAYS pray range or you will take 80+ damage from his triple range attack. The only damage you should be taking is from his melee attacks that do minimal damage in comparison. You can flick soulsplit on if you'd like more efficient kills. As always bring a familiar to speed up kills.


