| N/A | N/A | N/A | |||
| N/A | N/A | N/A | |||
| N/A | |||||
| Fine:Karil's_leathertop.png Karil's Leathertop | N/A | N/A | N/A | ||
| N/A | N/A | ||||
| N/A | N/A | ||||
| File:Dragonfire shield (uncharged).png Dragonfire Shield | N/A | N/A | |||
| N/A | N/A | N/A | N/A | N/A | |
| N/A | |||||
| N/A | N/A | N/A | |||
No edit summary |
No edit summary |
||
| Line 12: | Line 12: | ||
== Recommended Gear == | == Recommended Gear == | ||
Chaos elemental is the easiest boss by far. You can bring a Whip, Amulet of Glory, And full Black Dragonhide and you will consistently kill it very easily. Currently as of writing this guide, The Chaos Elemental will do NO DAMAGE if you protect from magic against it. Which means realistically all you need are prayer / super restore potions and super combats for faster kills. It is recommended you turn OFF the vial breaking setting if you are a donator so that your inventory will stay full even after emptying your super restores as the Chaos Elemental will un-equip your items which prevents AFK kills. | Chaos elemental is the easiest boss by far. You can bring a Whip, Amulet of Glory, And full Black Dragonhide and you will consistently kill it very easily. Currently as of writing this guide, The Chaos Elemental will do NO DAMAGE if you protect from magic against it. Which means realistically all you need are prayer / super restore potions and super combats for faster kills. It is recommended you turn OFF the vial breaking setting if you are a donator so that your inventory will stay full even after emptying your super restores as the Chaos Elemental will un-equip your items which prevents AFK kills. | ||
| Line 20: | Line 21: | ||
! <center>Slot</center> !! colspan="5"|<center>Recommended Melee Setup</center> | ! <center>Slot</center> !! colspan="5"|<center>Recommended Melee Setup</center> | ||
|- | |- | ||
|[[File:Head slot.png|center]] || [[File:Serpentine helm.png]] Serpentine helm or [[File:Helm of neitiznot.png]] Helm of Neitiznot || [[File: | |[[File:Head slot.png|center]] || [[File:Serpentine helm.png]] Serpentine helm or [[File:Helm of neitiznot.png]] Helm of Neitiznot || [[File:Warrior_helm.png]] Warriors Helm || {{NA}} || {{NA}} || {{NA}} | ||
|- | |- | ||
|[[File:Neck slot.png|center]] | |[[File:Neck slot.png|center]] || [[File:Amulet of fury.png]] Amulet of fury || [[File:Amulet_of_gloryxx.png]] Amulet of glory || {{NA}} || {{NA}} || {{NA}} | ||
|- | |- | ||
|[[File:Cape slot.png|center]] || [[File:Completionist_cape.png]] (Slaughter/Master) Completionists cape || [[File:Tokhaar-kal.png]] Tokhaar-kal || [[File:Fire cape.png]] Fire cape || [[File:Max cape.png]] Max cape || {{NA}} | |[[File:Cape slot.png|center]] || [[File:Completionist_cape.png]] (Slaughter/Master) Completionists cape || [[File:Tokhaar-kal.png]] Tokhaar-kal || [[File:Fire cape.png]] Fire cape || [[File:Max cape.png]] Max cape || {{NA}} | ||
|- | |- | ||
|[[File:Body slot.png|center]] || [[ | |[[File:Body slot.png|center]] || [[Fine:Karil's_leathertop.png]] Karil's Leathertop || [[File:Blessed body.gif]] Blessed body or [[File:Black d'hide body.png]] Black d'hide body || {{NA}} || {{NA}} || {{NA}} | ||
|- | |||
|[[File:Legs slot.png|center]] || [[File:Dharok's platelegs.png]] Dharok's platelegs (or Barrows platelegs) || [[File:Karil's leatherskirt.png]] Karil's leatherskirt || [[File:Blessed chaps.gif]] Blessed chaps or [[File:Black d'hide chaps.png]] Black d'hide chaps || {{NA}} || {{NA}} | |||
|- | |- | ||
|[[File: | |[[File:Weapon slot.png|center]] || [[File:Chaotic_rapier.png]] Chaotic Rapier || [[File:Blade_of_saeldor.png]] Blade of Saeldor ||[[File:Abyssal_whip.png]] Abyssal whip || {{NA}} || {{NA}} | ||
|- | |- | ||
|[[File: | |[[File:Shield slot.png|center]] || [[File:Avernic_defender.png]] Avernic Defender || [[File:Dragon_defender.png]] Dragon Defender || [[File:Dragonfire shield (uncharged).png]] Dragonfire Shield || {{NA}} || {{NA}} | ||
|- | |- | ||
|- | |- | ||
|[[File:Ammo slot.png|center]] || {{NA}} || {{NA}} || {{NA}} || {{NA}} || {{NA}} | |[[File:Ammo slot.png|center]] || {{NA}} || {{NA}} || {{NA}} || {{NA}} || {{NA}} | ||
Revision as of 11:07, 20 April 2023


Introduction
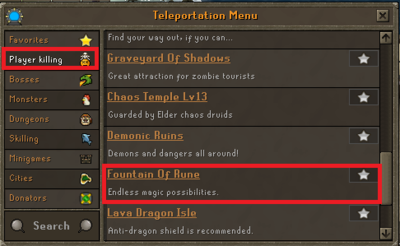
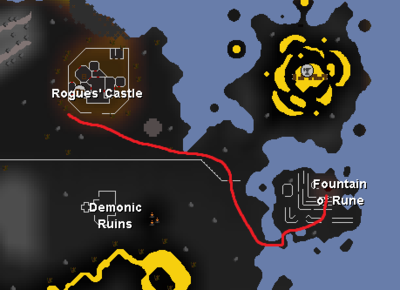
The Chaos Elemental is a dark cloud with six tentacles that dwells in the deepest section of the Wilderness, just west of the Rogues' Castle. This area is moderately easy to access from the deep Wilderness teleport "Fountain Of Rune. The nearby Wilderness Obelisk can randomly teleport players south-east of the Rogues' Castle to get back to Home.
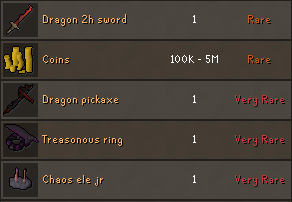
The Chaos Elemental is generally killed for its dragon pickaxe drops and wilderness daily tasks. It also has a higher drop rate of the pet chaos elemental compared to other bosses in the game.
Warning: As this boss is located deep within the Wilderness, and wanders around in a multi-combat zone, beware of player-killers! Do not bring items you are not willing to lose.
Recommended Gear
Chaos elemental is the easiest boss by far. You can bring a Whip, Amulet of Glory, And full Black Dragonhide and you will consistently kill it very easily. Currently as of writing this guide, The Chaos Elemental will do NO DAMAGE if you protect from magic against it. Which means realistically all you need are prayer / super restore potions and super combats for faster kills. It is recommended you turn OFF the vial breaking setting if you are a donator so that your inventory will stay full even after emptying your super restores as the Chaos Elemental will un-equip your items which prevents AFK kills.
The Fight
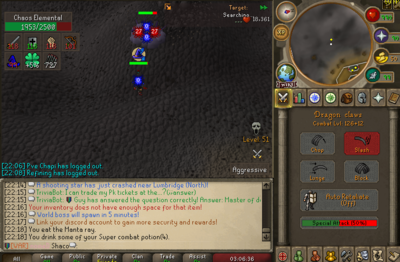
Turn on auto-retaliate. Protect from Magic. Watch netflix.
NOTE: This will most likely change in the future, So if you notice you are taking damage, Please let me know or edit the wiki yourself to alert players this has changed.


