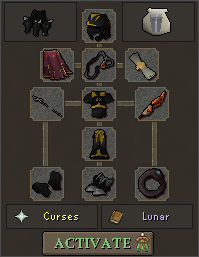
- 99 Slayer
No edit summary |
(Finished Guide) |
||
| (7 intermediate revisions by 4 users not shown) | |||
| Line 1: | Line 1: | ||
[[File: | [[File:Rammernaut Teleport.png|thumb|'Rammernaut Teleport']] | ||
== '''Introduction''' == | |||
'''Rammernaut''' is a level 517 mechanic-heavy boss. Rammernaut may seem scary to face at first, but the fight is very learnable for beginners and experienced players alike. Rammernaut is weakest to Crush, so it's recommended to use a good Crush Weapon. The teleport can be found by opening the Teleport Menu -> Bosses -> 1st Page -> Rammernaut | |||
* | == '''Requirements & Recommended''' == | ||
* | <tabber> | ||
|-|Requirements= | |||
* 99 Slayer | |||
|-|Recommended= | |||
[[File:Melee Pet Perks.png|thumb|''Melee Pet Perks'']] | |||
* 99 Summoning - Steel Titan Familiar | |||
* 95 Prayer & Curses - Turmoil and Soulsplit | |||
* High Herblore Level for Super Combats/Overloads | |||
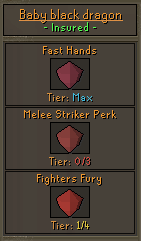
* Melee Pet Perks (Fast Hands, Melee Striker, Fighter's Fury) | |||
</tabber> | |||
== | == '''Gear Setups''' == | ||
<tabber> | |||
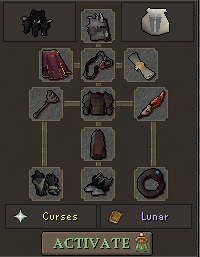
|-|Melee Inquisitor= | |||
[[File:Rammernaut Inq 2.png|center|frame]] | |||
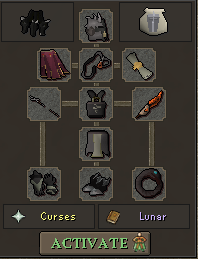
|-|Melee Bandos= | |||
[[File:Rammernaut Bandos.png|center|frame]] | |||
|-|Melee Void= | |||
[[File:Rammernaut Void.png|center|frame]] | |||
</tabber> | |||
== '''Inventory''' == | |||
[[File:Rammernaut Inventory.png|thumb|'Inventory - Bring more food for beginners']] | |||
With this method and good gear, you only need to eat in emergencies. SoulSplit should be able to keep you at max HP. | |||
* Long range Magic/Range switch for Minions | |||
* BGS/DWH for Stat Lowering Special (Highly Recommended) | |||
* Super Combats/Overloads (Recommended) | |||
* Prayer Potions/Super Restores | |||
* Stamina Potions | |||
* Emergency Combo Food (Karambwans/Sara Brews if using Overloads) | |||
* Veng runes for extra damage (Rune Pouch Recommended) | |||
* Steel Titan Scrolls | |||
* Backup Steel Titan Pouch | |||
== '''The Fight''' == | |||
<tabber> | <tabber> | ||
Melee | |-|Mechanics= | ||
Rammernaut tells you what mechanic he is doing by YELLING it before he does it. This makes it the boss very learnable. Although it may seem like a lot to take in, his mechanics are quite simple. | |||
=== GET OVER HERE === | |||
* Typeless attack that CAN'T be prayed against - 900 Damage | |||
* Avoid the hand coming from the ground. An easy method of this to maintain DPS is to step diagonally, then proceed attacking | |||
[[File:Rammernaut Get over Here.png|center|frame]] | |||
=== SWINGING === | |||
* Melee attack that CAN'T be prayed against - 200-400 Damage | |||
* Simply step 1-2 tiles back, then proceed attacking to avoid all damage | |||
[[File:Rammernaut Swinging.png|center|frame]] | |||
=== FALLING === | |||
* Typeless attack that CAN"T be prayed against - 500-600 Damage | |||
* Simply step 3-4 tiles back, then proceed attacking to avoid all damage | |||
[[File:Rammernaut Falling.png|center|frame]] | |||
=== BOMBERS, GO === | |||
* Spawns a tracking minion that will damage you if it reaches the player - 750 Damage | |||
* Switch to a long range magic/range weapon and kill it. Low HP, should one shot it | |||
[[File:Rammernaut Bombers Go.png|center|frame]] | |||
[[File:Rammernaut Bombers.png|center|frame]] | |||
=== STOP MOVING === | |||
* Soft Stun attack that CAN'T be prayed against | |||
* If you move while he is doing this attack, you won't be able to attack till stun is over. If you don't move, you can continue attacking while stunned | |||
* Be prepared to react to Rammernaut's next mechanic while being stunned (sip a restore/sip stam pot/stay high health/get ready to avoid mechanic) | |||
[[File:Rammernaut Stop Moving.png|center|frame]] | |||
=== Auto Melee Attack === | |||
* This is where Veng comes into play. Always keep Veng up for extra recoil damage | |||
* Usually very safe to let SoulSplit heal you back up | |||
|-|Strategy= | |||
The fight consists of reacting to Rammernaut's mechanics, as described above. It is very straightforward and learnable after a few attempts/deaths. | |||
* Pot up, turn on SoulSplit/Turmoil, teleport to the boss arena, and use your Stat Lowering special attacks | |||
* React to whatever mechanic Rammernaut is doing | |||
|-|Tips and Tricks= | |||
|-|Notable Drops= | |||
[[File:Rammernaut Drops.png|center|frame]] | |||
</tabber> | |||
Latest revision as of 14:28, 4 January 2024
Introduction[edit | edit source]
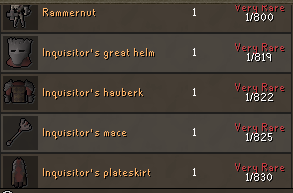
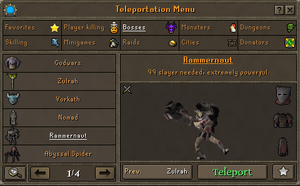
Rammernaut is a level 517 mechanic-heavy boss. Rammernaut may seem scary to face at first, but the fight is very learnable for beginners and experienced players alike. Rammernaut is weakest to Crush, so it's recommended to use a good Crush Weapon. The teleport can be found by opening the Teleport Menu -> Bosses -> 1st Page -> Rammernaut
Requirements & Recommended[edit | edit source]
Gear Setups[edit | edit source]
Inventory[edit | edit source]
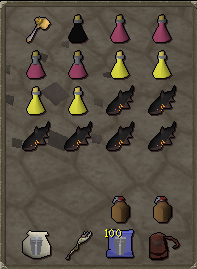
With this method and good gear, you only need to eat in emergencies. SoulSplit should be able to keep you at max HP.
- Long range Magic/Range switch for Minions
- BGS/DWH for Stat Lowering Special (Highly Recommended)
- Super Combats/Overloads (Recommended)
- Prayer Potions/Super Restores
- Stamina Potions
- Emergency Combo Food (Karambwans/Sara Brews if using Overloads)
- Veng runes for extra damage (Rune Pouch Recommended)
- Steel Titan Scrolls
- Backup Steel Titan Pouch
The Fight[edit | edit source]
Rammernaut tells you what mechanic he is doing by YELLING it before he does it. This makes it the boss very learnable. Although it may seem like a lot to take in, his mechanics are quite simple.
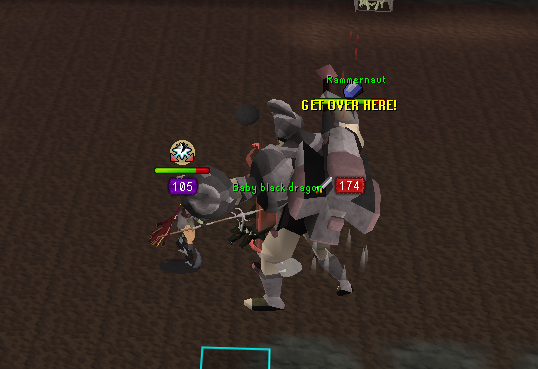
GET OVER HERE[edit | edit source]
- Typeless attack that CAN'T be prayed against - 900 Damage
- Avoid the hand coming from the ground. An easy method of this to maintain DPS is to step diagonally, then proceed attacking
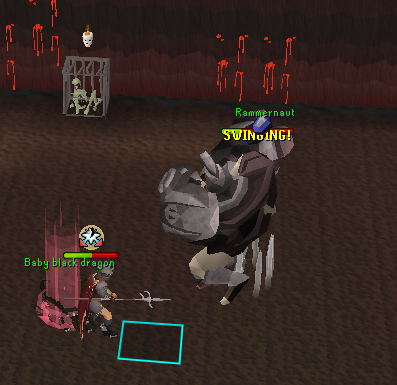
SWINGING[edit | edit source]
- Melee attack that CAN'T be prayed against - 200-400 Damage
- Simply step 1-2 tiles back, then proceed attacking to avoid all damage
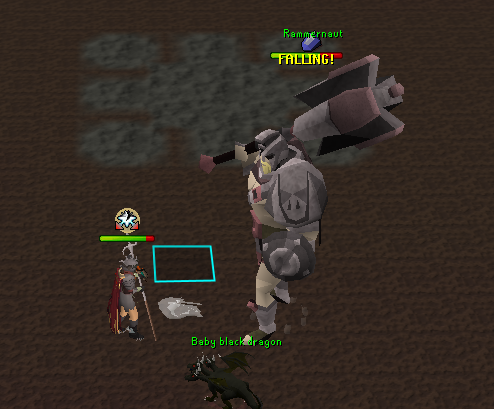
FALLING[edit | edit source]
- Typeless attack that CAN"T be prayed against - 500-600 Damage
- Simply step 3-4 tiles back, then proceed attacking to avoid all damage
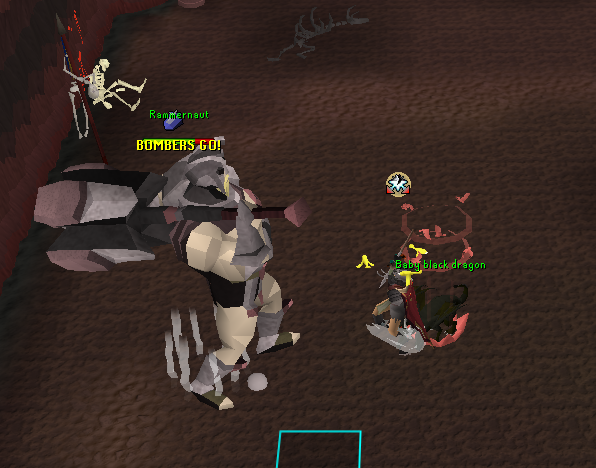
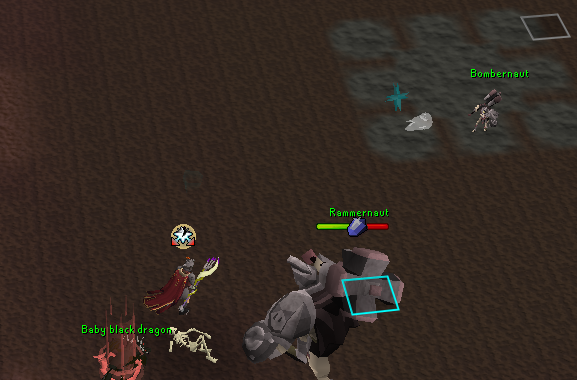
BOMBERS, GO[edit | edit source]
- Spawns a tracking minion that will damage you if it reaches the player - 750 Damage
- Switch to a long range magic/range weapon and kill it. Low HP, should one shot it
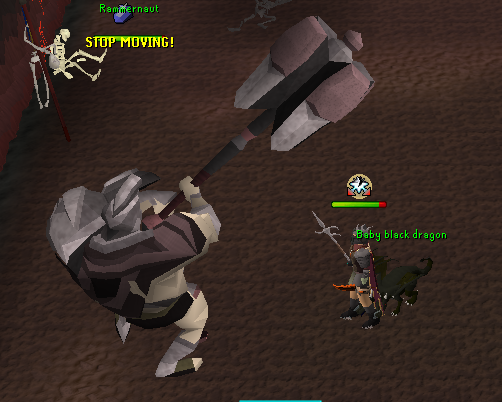
STOP MOVING[edit | edit source]
- Soft Stun attack that CAN'T be prayed against
- If you move while he is doing this attack, you won't be able to attack till stun is over. If you don't move, you can continue attacking while stunned
- Be prepared to react to Rammernaut's next mechanic while being stunned (sip a restore/sip stam pot/stay high health/get ready to avoid mechanic)
Auto Melee Attack[edit | edit source]
- This is where Veng comes into play. Always keep Veng up for extra recoil damage
- Usually very safe to let SoulSplit heal you back up
- Pot up, turn on SoulSplit/Turmoil, teleport to the boss arena, and use your Stat Lowering special attacks
- React to whatever mechanic Rammernaut is doing
