No edit summary |
No edit summary |
||
| (One intermediate revision by the same user not shown) | |||
| Line 16: | Line 16: | ||
|[[File:Neck slot.png|center]] || [[File:Amulet of torture.png]] Amulet of torture || [[File:Amulet of fury.png]] Amulet of fury || [[File:Amulet of glory.png]] Amulet of glory || {{NA}} || {{NA}} | |[[File:Neck slot.png|center]] || [[File:Amulet of torture.png]] Amulet of torture || [[File:Amulet of fury.png]] Amulet of fury || [[File:Amulet of glory.png]] Amulet of glory || {{NA}} || {{NA}} | ||
|- | |- | ||
|[[File:Cape slot.png|center]] || [[File:Completionist cape.png]] (Slaughter/Master) Completionists cape || [[File:Tokhaar-kal.png]] Tokhaar-kal || [[File:Fire cape.png]] Fire cape || [[File:Max cape.png]] Max cape || | |[[File:Cape slot.png|center]] || [[File:Completionist cape.png]] (Slaughter/Master) Completionists cape || [[File:Tokhaar-kal.png]] Tokhaar-kal || [[File:Fire cape.png]] Fire cape || [[File:Max cape.png]] Max cape || Skill cape of any skill | ||
|- | |- | ||
|[[File:Body slot.png|center]] || [[File:Dharok's platebody.png]] Dharok's platebody || | |[[File:Body slot.png|center]] || [[File:Dharok's platebody.png]] Dharok's platebody || | ||
| Line 42: | Line 42: | ||
|[[File:Neck slot.png|center]] || [[File:Amulet of torture.png]] Amulet of torture || [[File:Amulet of fury.png]] Amulet of fury || [[File:Amulet of glory.png]] Amulet of glory || {{NA}} || {{NA}} | |[[File:Neck slot.png|center]] || [[File:Amulet of torture.png]] Amulet of torture || [[File:Amulet of fury.png]] Amulet of fury || [[File:Amulet of glory.png]] Amulet of glory || {{NA}} || {{NA}} | ||
|- | |- | ||
|[[File:Cape slot.png|center]] || [[File:Completionist cape.png]] (Slaughter/Master) Completionists cape || [[File:Tokhaar-kal.png]] Tokhaar-kal || [[File:Fire cape.png]] Fire cape || [[File:Max cape.png]] Max cape || | |[[File:Cape slot.png|center]] || [[File:Completionist cape.png]] (Slaughter/Master) Completionists cape || [[File:Tokhaar-kal.png]] Tokhaar-kal || [[File:Fire cape.png]] Fire cape || [[File:Max cape.png]] Max cape || Skill cape of any skill | ||
|- | |- | ||
|[[File:Body slot.png|center]] || [[File:Dharok's platebody.png]] Dharok's platebody || [[File:Statius's platebody.png]] Statius's platebody || [[File:Torva platebody.png]] Torva platebody || [[File:Bandos chestplate.png]] Bandos chestplate || | |[[File:Body slot.png|center]] || [[File:Dharok's platebody.png]] Dharok's platebody || [[File:Statius's platebody.png]] Statius's platebody || [[File:Torva platebody.png]] Torva platebody || [[File:Bandos chestplate.png]] Bandos chestplate || | ||
| Line 75: | Line 75: | ||
|[[File:Neck slot.png|center]] || [[File:Arcane stream necklace.png]] Arcane stream necklace || [[File:Occult necklace.png]] Occult necklace || [[File:Amulet of fury.png]] Amulet of fury || [[File:Amulet of glory.png]] Amulet of glory | |[[File:Neck slot.png|center]] || [[File:Arcane stream necklace.png]] Arcane stream necklace || [[File:Occult necklace.png]] Occult necklace || [[File:Amulet of fury.png]] Amulet of fury || [[File:Amulet of glory.png]] Amulet of glory | ||
|- | |- | ||
|[[File:Cape slot.png|center]] || [[File:Imbued god capes.gif]] || [[File:Slaughter completionist cape.png]] Slaughter completionist cape || [[File:Completionist cape.png]] Completionist cape || [[File:Slaughter master cape.png]] Slaughter master cape || [[File:Max cape]] Max cape | |[[File:Cape slot.png|center]] || [[File:Imbued god capes.gif]] || [[File:Slaughter completionist cape.png]] Slaughter completionist cape || [[File:Completionist cape.png]] Completionist cape || [[File:Slaughter master cape.png]] Slaughter master cape || [[File:Max cape.png]] Max cape | ||
|- | |- | ||
|[[File:Body slot.png|center]] || {{Colour|#ff5e5e|UPGRADED VERSION}}[[File:Virtus robe top.png]] Upgraded Virtus body || [[File:Virtus robe top.png]] Virtus body || [[File:Ancestral robe top.png]] Ancestral robe top || [[File:Zuriel's robe top.png]] Zuriel's robe top || [[File:Ahrim's robetop.png]] Ahrim's robetop || [[File:Mystic robe top.png]] Mystic robe top | |[[File:Body slot.png|center]] || {{Colour|#ff5e5e|UPGRADED VERSION}}[[File:Virtus robe top.png]] Upgraded Virtus body || [[File:Virtus robe top.png]] Virtus body || [[File:Ancestral robe top.png]] Ancestral robe top || [[File:Zuriel's robe top.png]] Zuriel's robe top || [[File:Ahrim's robetop.png]] Ahrim's robetop || [[File:Mystic robe top.png]] Mystic robe top | ||
Latest revision as of 17:46, 30 December 2023


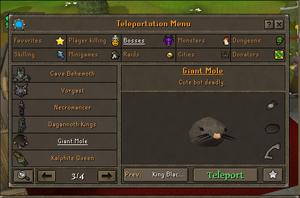
The Giant Mole Is a popular boss for people to grind for the Mole Pet Drop. Taking almost no damage, it's incredibly easy to kill. The only downside is currently the Giant Mole is in a singles area. If it becomes a multi area, You SHOULD be able to use your familiar to find where the Mole digs to when its Health is low.
The only real mechanics the giant mole has is basic melee attacks you can mostly ignore. When he is 50% HP or lower, he will dig to a random part of the cave and you will have to find him. A good way of killing him is to use a poison / venom weapon so while it takes you a bit to find him he is continuing to die (Poison damage won't trigger him to dig again) Like stated above, If the cave is made into a multi combat area, You should be able to use your familiar to find him when he digs as he will walk to where the direction of the mole has gone.
Bring your best melee gear and a stamina potion or 10. Realistically Mole is weak to almost everything, So Mage / Melee it in whatever you want to use.


