| N/A | |||||
| N/A | |||||
| N/A | N/A | ||||
| N/A | |||||
| N/A | |||||
| File:Dragonfire shield (uncharged).png Dragonfire Shield | N/A | N/A | |||
| N/A | N/A | N/A | N/A | ||
| N/A | N/A | ||||
| N/A | N/A | ||||
| N/A | N/A | ||||
No edit summary |
No edit summary |
||
| (5 intermediate revisions by the same user not shown) | |||
| Line 18: | Line 18: | ||
! <center>Slot</center> !! colspan="5"|<center>Item (most effective → least effective) </center> | ! <center>Slot</center> !! colspan="5"|<center>Item (most effective → least effective) </center> | ||
|- | |- | ||
|[[File:Head slot.png|center]] || [[File:Morrigan's coif.png]] Morrigan's coif || [[File:Armadyl helmet.png]] Armadyl helmet || [[File:Serpentine helm.png]] Serpentine helm || [[File:Helm of neitiznot.png]] Helm of Neitiznot | |[[File:Head slot.png|center]] || [[File:Morrigan's coif.png]] Morrigan's coif || [[File:Armadyl helmet.png]] Armadyl helmet || [[File:Serpentine helm.png]] Serpentine helm || [[File:Helm of neitiznot.png]] Helm of Neitiznot || {{NA}} | ||
|- | |- | ||
|[[File:Neck slot.png|center]] || [[File:Necklace of anguish.png]] Necklace of anguish || [[File:Amulet_of_ranging.png]] Amulet of Ranging || [[File:Amulet of fury.png]] Amulet of fury || [[File:Amulet_of_gloryxx.png]] Amulet of glory || {{NA}} | |[[File:Neck slot.png|center]] || [[File:Necklace of anguish.png]] Necklace of anguish || [[File:Amulet_of_ranging.png]] Amulet of Ranging || [[File:Amulet of fury.png]] Amulet of fury || [[File:Amulet_of_gloryxx.png]] Amulet of glory || {{NA}} | ||
| Line 24: | Line 24: | ||
|[[File:Cape slot.png|center]] || [[File:Ava's_assembler2.png]] Ava's accumulator || [[File:Ranging cape.png]] Ranging cape || [[File:Ava's attractor.png]] Ava's attractor || {{NA}} || {{NA}} | |[[File:Cape slot.png|center]] || [[File:Ava's_assembler2.png]] Ava's accumulator || [[File:Ranging cape.png]] Ranging cape || [[File:Ava's attractor.png]] Ava's attractor || {{NA}} || {{NA}} | ||
|- | |- | ||
|[[File:Body slot.png|center]]|| [[File:Morrigan's leather body.png]] Morrigan's leather body || [[File:Armadyl chestplate.png]] Armadyl chestplate || [[File:Karil's leathertop.png]] Karil's leathertop || [[File:Blessed body.gif]] Blessed body or [[File:Black d'hide body.png]] Black d'hide body | |[[File:Body slot.png|center]]|| [[File:Morrigan's leather body.png]] Morrigan's leather body || [[File:Armadyl chestplate.png]] Armadyl chestplate || [[File:Karil's leathertop.png]] Karil's leathertop || [[File:Blessed body.gif]] Blessed body or [[File:Black d'hide body.png]] Black d'hide body || {{NA}} | ||
|- | |- | ||
|[[File:Legs slot.png|center]]|| [[File:Morrigan's leather chaps.png]] Morrigan's leather body || [[File:Armadyl chainskirt.png]] Armadyl chainskirt || [[File:Karil's leatherskirt.png]] Karil's leatherskirt || [[File:Blessed chaps.gif]] Blessed chaps or [[File:Black d'hide chaps.png]] Black d'hide chaps | |[[File:Legs slot.png|center]]|| [[File:Morrigan's leather chaps.png]] Morrigan's leather body || [[File:Armadyl chainskirt.png]] Armadyl chainskirt || [[File:Karil's leatherskirt.png]] Karil's leatherskirt || [[File:Blessed chaps.gif]] Blessed chaps or [[File:Black d'hide chaps.png]] Black d'hide chaps || {{NA}} | ||
|- | |- | ||
|[[File:Weapon slot.png|center]] || [[File:Chaoticxbow.png |30px]] Chaotic crossbow || [[File:Armadyl crossbow.png]] Armadyl crossbow || [[File:Dragon hunter crossbow.png]] Dragon hunter crossbow || [[File:Dragon_crossbow.png]] Dragon crossbow || [[File:Rune crossbow.png]] Rune Crossbow | |[[File:Weapon slot.png|center]] || [[File:Chaoticxbow.png |30px]] Chaotic crossbow || [[File:Armadyl crossbow.png]] Armadyl crossbow || [[File:Dragon hunter crossbow.png]] Dragon hunter crossbow || [[File:Dragon_crossbow.png]] Dragon crossbow || [[File:Rune crossbow.png]] Rune Crossbow | ||
|- | |- | ||
|[[File:Shield slot.png|center]] || [[File: | |[[File:Shield slot.png|center]] || [[File:Dragonfire shield (uncharged).png]] Dragonfire Shield || [[File:Dragonfire ward.png]] Dragonfire ward || [[File:Anti-dragon shield.png]] Anti-Dragon Shield || {{NA}} || {{NA}} | ||
|- | |- | ||
|[[File:Ammo slot.png|center]] || | [[File:Ruby dragon bolts (e) 5.png |30px]] Ruby dragon bolts (e) || {{NA}} || {{NA}} || {{NA}} || {{NA}} | |[[File:Ammo slot.png|center]] || | [[File:Ruby dragon bolts (e) 5.png |30px]] Ruby dragon bolts (e) || {{NA}} || {{NA}} || {{NA}} || {{NA}} | ||
| Line 48: | Line 48: | ||
! <center>Slot</center> !! colspan="5"|<center>Item (most effective → least effective) </center> | ! <center>Slot</center> !! colspan="5"|<center>Item (most effective → least effective) </center> | ||
|- | |- | ||
|[[File:Head slot.png|center]] || [[File:Inquisitor's great helm.png]] Inquisitor's great helm<sup>1</sup> || [[File:Neitiznot faceguard.png]] Neitiznot faceguard || [[File:Torva full helm.png]] Torva full helm || [[File: | |[[File:Head slot.png|center]] || [[File:Inquisitor's great helm.png]] Inquisitor's great helm<sup>1</sup> || [[File:Neitiznot faceguard.png]] Neitiznot faceguard || [[File:Torva full helm.png]] Torva full helm || [[File:Slayer_helmet_(i).png]] Slayer helm (i)<sup>2</sup> || [[File:Serpentine helm.png]] Serpentine helm or [[File:Helm of neitiznot.png]] Helm of Neitiznot | ||
|- | |- | ||
|[[File:Neck slot.png|center]] || [[File:Amulet of torture.png]] Amulet of torture || [[File:Amulet of fury.png]] Amulet of fury || [[File: | |[[File:Neck slot.png|center]] || [[File:Amulet of torture.png]] Amulet of torture || [[File:Amulet of fury.png]] Amulet of fury || [[File:Amulet_of_gloryxx.png]] Amulet of glory || {{NA}} || {{NA}} | ||
|- | |- | ||
|[[File:Cape slot.png|center]] || [[File: | |[[File:Cape slot.png|center]] || [[File:Completionist_cape.png]] (Slaughter/Master) Completionists cape || [[File:Tokhaar-kal.png]] Tokhaar-kal || [[File:Fire cape.png]] Fire cape || [[File:Max cape.png]] Max cape || {{NA}} | ||
|- | |- | ||
|[[File:Body slot.png|center]] || [[File: Inquisitor's hauberk.png]] Inquisitor's hauberk || [[File:Statius's platebody.png]] Statius's platebody || [[File:Torva platebody.png]] Torva platebody || [[File:Bandos chestplate.png]] Bandos chestplate || [[File:Dharok's platebody.png]] Dharok's platebody (or Barrows platebodies) | |[[File:Body slot.png|center]] || [[File: Inquisitor's hauberk.png]] Inquisitor's hauberk || [[File:Statius's platebody.png]] Statius's platebody || [[File:Torva platebody.png]] Torva platebody || [[File:Bandos chestplate.png]] Bandos chestplate || [[File:Dharok's platebody.png]] Dharok's platebody (or Barrows platebodies) | ||
| Line 58: | Line 58: | ||
|[[File:Legs slot.png|center]] || [[File: Inquisitor's plateskirt.png]] Inquisitor's plateskirt || [[File:Statius's platelegs.png]] Statius's platelegs || [[File:Torva platelegs.png]] Torva platelegs || [[File:Bandos tassets.png]] Bandos tassets || [[File:Dharok's platelegs.png]] Dharok's platelegs (or Barrows platelegs) | |[[File:Legs slot.png|center]] || [[File: Inquisitor's plateskirt.png]] Inquisitor's plateskirt || [[File:Statius's platelegs.png]] Statius's platelegs || [[File:Torva platelegs.png]] Torva platelegs || [[File:Bandos tassets.png]] Bandos tassets || [[File:Dharok's platelegs.png]] Dharok's platelegs (or Barrows platelegs) | ||
|- | |- | ||
|[[File:Weapon slot.png|center]] || | |[[File:Weapon slot.png|center]] || [[File:Dragon hunter lance.png]] Dragon hunter lance<sup>1</sup> || [[File:Chaotic_rapier.png]] Chaotic rapier ||[[File:Blade_of_saeldor.png]] Blade of Saeldor || [[File:Abyssal_whip.png]] Abyssal whip || {{NA}} | ||
|- | |- | ||
|[[File:Shield slot.png|center]] || [[File: | |[[File:Shield slot.png|center]] || [[File:Dragonfire shield (uncharged).png]] Dragonfire Shield || [[File:Dragonfire ward.png]] Dragonfire ward || [[File:Anti-dragon shield.png]] Anti-Dragon Shield || {{NA}} || {{NA}} | ||
|- | |- | ||
|[[File:Ammo slot.png|center]] || {{NA}} || {{NA}} || {{NA}} || {{NA}} || {{NA}} | |[[File:Ammo slot.png|center]] || {{NA}} || {{NA}} || {{NA}} || {{NA}} || {{NA}} | ||
| Line 66: | Line 66: | ||
|[[File:Hands slot.png|center]] || [[File:Ferocious gloves.png]] Ferocious gloves || [[File:Goliath gloves (black).png]] Goliath gloves || [[File:Barrows gloves.png]] Barrows gloves || [[File:Dragon gloves.png]] Dragon gloves || [[File: Rune gloves.png]] Rune gloves | |[[File:Hands slot.png|center]] || [[File:Ferocious gloves.png]] Ferocious gloves || [[File:Goliath gloves (black).png]] Goliath gloves || [[File:Barrows gloves.png]] Barrows gloves || [[File:Dragon gloves.png]] Dragon gloves || [[File: Rune gloves.png]] Rune gloves | ||
|- | |- | ||
|[[File:Feet slot.png|center]] || [[File: | |[[File:Feet slot.png|center]] || [[File:Primordial_boots.png]] Primordial boots || [[File:Dragon_boots.png]] Dragon boots|| [[File:Bandos boots.png]] Bandos boots || [[File:Rock_climbing_boots.png]] Rock climbing boots || {{NA}} | ||
|- | |- | ||
|[[File:Ring slot.png|center]] || [[File:Berserker ring (i).png]] Berserker ring (i) || [[File: | |[[File:Ring slot.png|center]] || [[File:Berserker ring (i).png]] Berserker ring (i) || [[File:Ring_of_suffering_(i).png]] Ring of Suffering (i) || [[File:Berserker ring.png]] Berserker ring || [[File:Ring of wealth.png]] Ring of wealth (i) || [[File:Ring of wealth.png]] Ring of wealth | ||
|- | |- | ||
|[[File:Special attack orb.png]] || [[File:Vesta's longsword.png]] Vesta's longsword || [[File:Statius's warhammer.png]] Statius's warhammer || [[File: | |[[File:Special attack orb.png]] || [[File:Vesta's longsword.png]] Vesta's longsword || [[File:Statius's warhammer.png]] Statius's warhammer || [[File:Dragon_dagger.png]] Dragon dagger || {{NA}} || {{NA}} | ||
|- | |- | ||
|} | |} | ||
Latest revision as of 09:23, 20 April 2023


Introduction[edit | edit source]
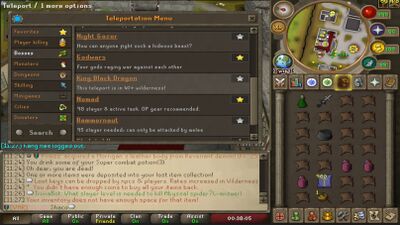
The King Black Dragon, commonly referred to as KBD, is a three-headed dragon located in his lair, accessible only through the deep Wilderness. Although the lair itself is not in the Wilderness, he is still considered a Wilderness boss by designation. The King Black Dragon has a combat level of 276, which makes him one of the strongest dragons on Arigon. Players should always take an anti-dragon shield as his dragonfire breath is very deadly without protection. The King Black Dragon can also be killed as an alternative for a black dragon Slayer task, except when assigned by Krystilia.
Although he will always fight back when attacked, he has gotten bored over the centuries from adventurers attacking him, as he revealed to his good friend Bob the cat.
While the King Black Dragon's lair is entered from within the Wilderness, his lair itself is not part of the Wilderness, so players cannot attack each other in his lair.
Recommended Gear[edit | edit source]
This is one of the easier bosses in the game assuming you have an anti-fire shield or a dragonfire shield. You can Melee him or Range him, Whatever your preference is. It is multi-way combat inside the lair, So if you have summoning level'd up, There's no harm in taking it with you to speed up your kills. Basic Black Dragonhide and Rune crossbow or a whip is more than sufficient.
| N/A | N/A | ||||
| N/A | |||||
| N/A | |||||
| File:Dragonfire shield (uncharged).png Dragonfire Shield | N/A | N/A | |||
| N/A | N/A | N/A | N/A | N/A | |
| N/A | |||||
| N/A | N/A | ||||
The Fight[edit | edit source]
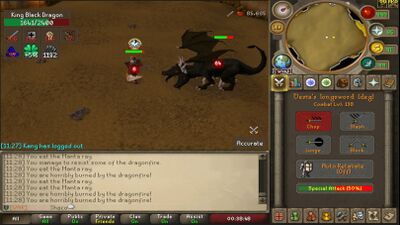
Considering how old the King Black Dragon is in terms of bosses in the game, The fight is about as straightforward as you can get. Attack the dragon until it dies. It's almost exactly the same as fighting a Green Dragon but he has more health and a few different dragonfire abilities, None of which will concern you, As you have an anti-dragonfire shield.


