| N/A | N/A | ||||
| N/A | |||||
| N/A | |||||
| File:Dragonfire shield (uncharged).png Dragonfire Shield | N/A | N/A | |||
| N/A | N/A | N/A | N/A | N/A | |
| N/A | |||||
| N/A | N/A | N/A | |||
No edit summary |
No edit summary |
||
| (4 intermediate revisions by the same user not shown) | |||
| Line 15: | Line 15: | ||
<tabber> | <tabber> | ||
Melee Method= | Melee Method= | ||
| Line 59: | Line 30: | ||
|[[File:Legs slot.png|center]] || [[File: Inquisitor's plateskirt.png]] Inquisitor's plateskirt || [[File:Statius's platelegs.png]] Statius's platelegs || [[File:Torva platelegs.png]] Torva platelegs || [[File:Bandos tassets.png]] Bandos tassets || [[File:Dharok's platelegs.png]] Dharok's platelegs (or Barrows platelegs) | |[[File:Legs slot.png|center]] || [[File: Inquisitor's plateskirt.png]] Inquisitor's plateskirt || [[File:Statius's platelegs.png]] Statius's platelegs || [[File:Torva platelegs.png]] Torva platelegs || [[File:Bandos tassets.png]] Bandos tassets || [[File:Dharok's platelegs.png]] Dharok's platelegs (or Barrows platelegs) | ||
|- | |- | ||
|[[File:Weapon slot.png|center]] || [[File: | |[[File:Weapon slot.png|center]] || [[File:Chaotic_rapier.png]] Chaotic Rapier || [[File:Blade_of_saeldor.png]] Blade of Saeldor ||[[File:Abyssal_whip.png]] Abyssal whip || [[File:Dragon hunter lance.png]] Dragon hunter lance<sup>1</sup> || {{NA}} | ||
|- | |- | ||
|[[File:Shield slot.png|center]] || [[File:Dragonfire shield (uncharged).png]] Dragonfire Shield || [[File:Avernic_defender.png]] Avernic Defender || [[File:Dragon_defender.png]] Dragon Defender || {{NA}} || {{NA}} | |[[File:Shield slot.png|center]] || [[File:Dragonfire shield (uncharged).png]] Dragonfire Shield || [[File:Avernic_defender.png]] Avernic Defender || [[File:Dragon_defender.png]] Dragon Defender || {{NA}} || {{NA}} | ||
| Line 67: | Line 38: | ||
|[[File:Hands slot.png|center]] || [[File:Ferocious gloves.png]] Ferocious gloves || [[File:Goliath gloves (black).png]] Goliath gloves || [[File:Barrows gloves.png]] Barrows gloves || [[File:Dragon gloves.png]] Dragon gloves || [[File: Rune gloves.png]] Rune gloves | |[[File:Hands slot.png|center]] || [[File:Ferocious gloves.png]] Ferocious gloves || [[File:Goliath gloves (black).png]] Goliath gloves || [[File:Barrows gloves.png]] Barrows gloves || [[File:Dragon gloves.png]] Dragon gloves || [[File: Rune gloves.png]] Rune gloves | ||
|- | |- | ||
|[[File:Feet slot.png|center]] || [[File:Primordial_boots.png]] Primordial boots || [[File:Dragon_boots.png]] Dragon boots|| [[File:Bandos boots.png]] Bandos boots || [[File:Rock_climbing_boots.png]] Rock climbing boots | |[[File:Feet slot.png|center]] || [[File:Primordial_boots.png]] Primordial boots || [[File:Dragon_boots.png]] Dragon boots|| [[File:Bandos boots.png]] Bandos boots || [[File:Rock_climbing_boots.png]] Rock climbing boots || {{NA}} | ||
|- | |- | ||
|[[File:Ring slot.png|center]] || [[File:Berserker ring (i).png]] Berserker ring (i) || [[File:Ring_of_suffering_(i).png]] Ring of Suffering (i) || [[File:Berserker ring.png]] Berserker ring || [[File:Ring of wealth.png]] Ring of wealth (i) || [[File:Ring of wealth.png]] Ring of wealth | |[[File:Ring slot.png|center]] || [[File:Berserker ring (i).png]] Berserker ring (i) || [[File:Ring_of_suffering_(i).png]] Ring of Suffering (i) || [[File:Berserker ring.png]] Berserker ring || [[File:Ring of wealth.png]] Ring of wealth (i) || [[File:Ring of wealth.png]] Ring of wealth | ||
Latest revision as of 09:16, 20 April 2023


Introduction[edit | edit source]
Note: At the time of writing this the Nomad boss was very easy to deal with. However, the developer has stated he is going to be updated relatively soon to be a difficult boss with increased rewards, So if you find this guide outdated, Please feel free to let me know or to edit the wiki yourself with the changes.
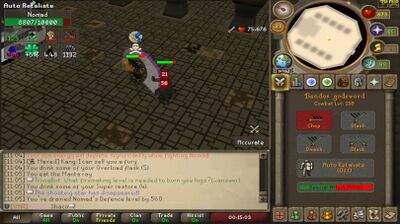
Nomad is an immensely powerful warrior-mage and with a combat level of 699, He is one of the higher level bosses in the game. He specializes in devastating Melee attacks, A bomb dropping mechanic that does a large amount of damage and a Magic teleport ability where he summons 8 clones of himself to attack you while healing himself. This boss in the future will most likely be very difficult to kill so you may want to get your kill count in now while you can.
Recommended Gear[edit | edit source]
Very high Melee offensive bonus. The Nomads defense bonuses are incredibly high, Making even max gear struggle to hit on him sometimes. It is highly recommended to take a Bandos Godsword or a Statius Warhammer to lower his defenses or you will notice you are struggling to get your kill speed down. The instance is multi-way combat, So a steel titan will also help immensely and should always be taken.
The Fight[edit | edit source]
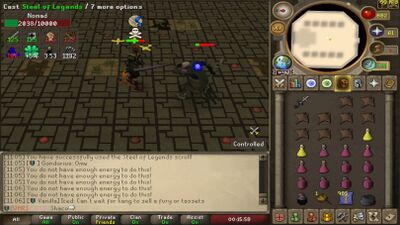
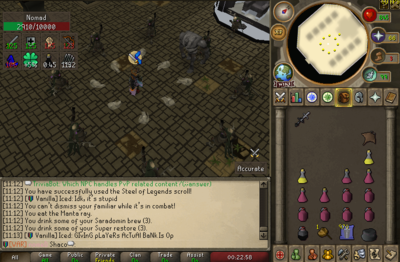
Although the fight will be harder in the future, It is currently pretty straightforward. Upon entering the Nomads domain, He will run at you. Simply Protect from Melee and proceed to attack him after using your BGS / Statius Warhammer special attacks to lower his defense. Periodically throughout the fight he will use 1 of 2 of his special attacks, Whether it's the bomb one of the Soul Suck. The bomb special attack is easily avoided, He drops little red dots on the floor that explode after a period of time (6-7 seconds I think) and do 50+ damage if you are unfortunate enough to be near one when it explodes. The Soul Suck special attack is when the Nomad teleports you into a circle of 8 of his clones. All 8 clones must be killed before attacking the Nomad again. The clones have very low HP but can hit relatively hard if you kill them too slow, So make sure you kill them quickly. The Nomad also has a stunning Melee attack that WILL hit through your prayer upwards of 45 damage, So don't camp too low HP or you might get caught off guard.


